Contentstack Management - Variants Actions
Variants are the different variations of an entry displayed to different audiences created within a Personalize project.
The Contentstack Management Variant Actions lets you update, publish, and fetch the details of all the variants in a Variant Group.
Note: You can create an Entry Variant for Variant Groups via Automate or the CMS. However, audiences for Experiences can be created only via the Contentstack Personalize platform.

Let’s look at each of them in detail.
Get All Variants of an Entry
This action fetches the details of all the variants of a specific entry for the selected content type.
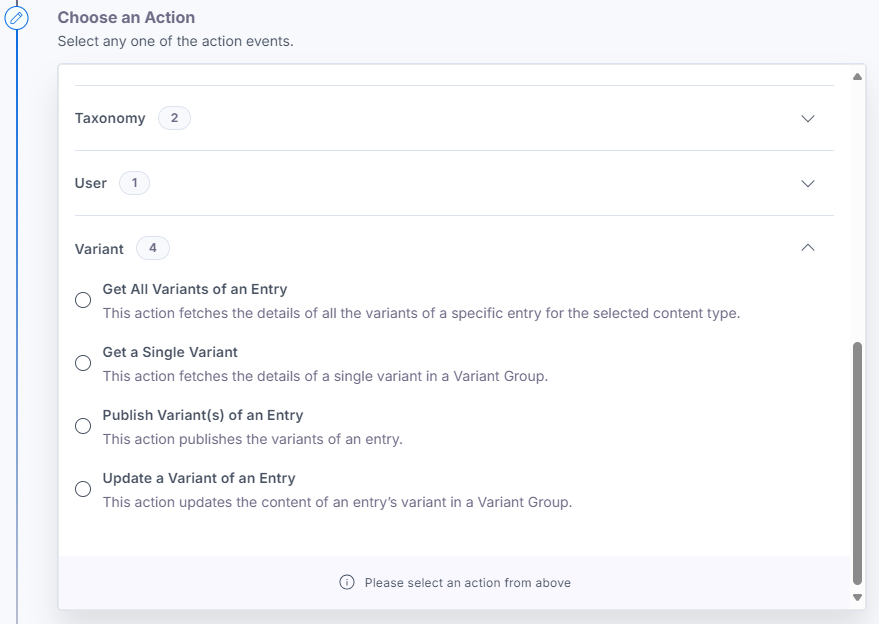
- Under Choose an Action tab, select the Get All Variants of an Entry action.
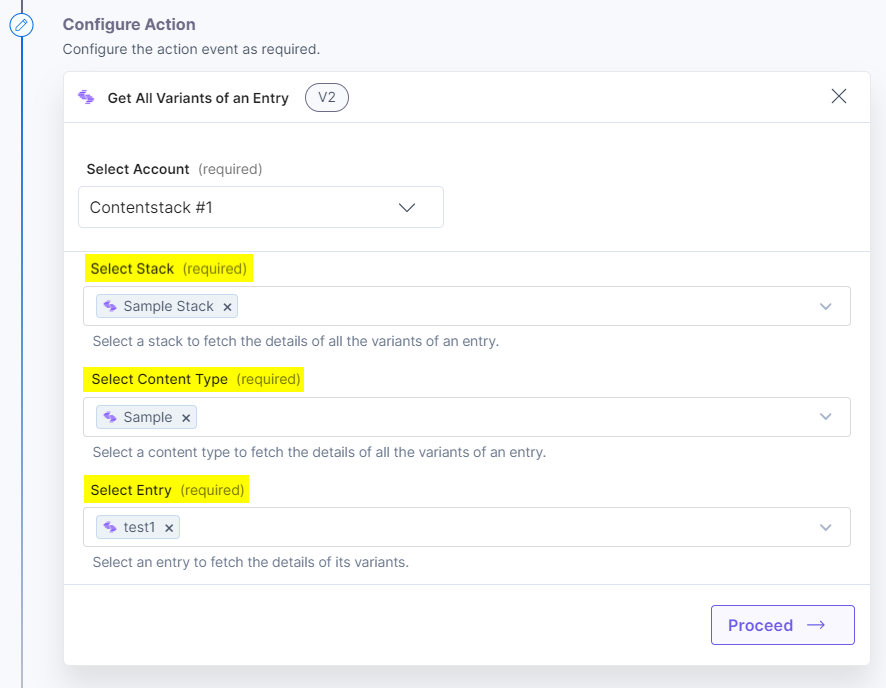
- On the Get All Variants of an Entry Configure Action page, enter the details given below:
- Click + Add New Account button to connect your Contentstack account as shown in the Connect your Contentstack Account to Automate step.
- Select a Stack, Content Type, and Entry from the Lookup list.

- Once done, click Proceed.
- Click Test Action to test the configured action.

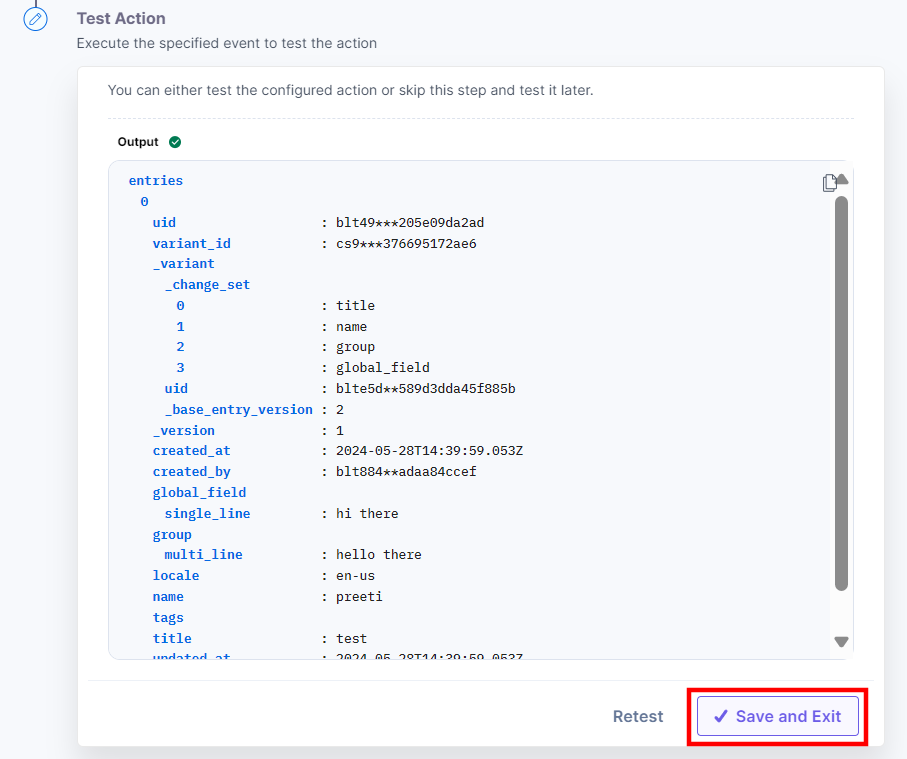
- On successful configuration, you can see the below output. Click Save and Exit.

Get a Single Variant
This action fetches the details of a single variant from a selected Variant Group.
- Under Choose an Action tab, select the Get a Single Variant action.
- On the Get a Single Variant Configure Action page, enter the details given below:
- Click + Add New Account button to connect your Contentstack account as shown in the Connect your Contentstack Account to Automate step.
- Select a Stack, Variant Group, and Variant from the Lookup list.

- Once done, click Proceed.
- Click Test Action to test the configured action.

- The output will be shown as follows. Click the Save and Exit button.

Publish Variant(s) of an Entry
This action publishes the entry’s existing variant(s).
- Under Choose an Action tab, select the Publish Variant(s) of an Entry action.
- On the Publish Variant(s) of an Entry Configure Action page, enter the details given below:
- Click + Add New Account button to connect your Contentstack account as shown in the Connect your Contentstack Account to Automate step.
- Select a Stack, Branch, Content Type, Entry, Variant Group, and Variant(s) from the Lookup list.

- Select the Locale(s) and Environment(s) to publish the entry’s variant. You can select multiple locales and environments.

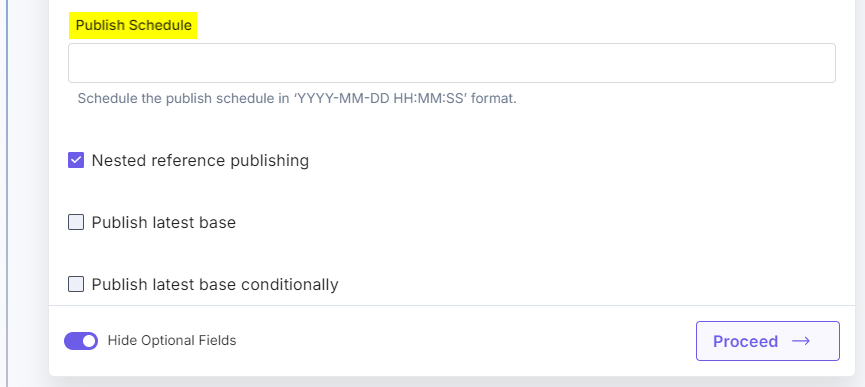
- Optionally, enable the Show Optional Fields toggle button to schedule the publishing activity. You can mark the checkboxes for Nested reference publishing, Publish latest base variant, Publish latest base conditionally.
Additional Resource: Refer to the Publish an Entry Variant document to learn more.

- Once done, click Proceed.
- Click Test Action to test the configured action.

- The output will be shown as follows. Click the Save and Exit button.

Update a Variant of an Entry
This action updates the content of an entry’s existing variant in the Variant Group.
- Under Choose an Action tab, select the Update a Variant of an Entry action.
- On the Update a Variant of an Entry Configure Action page, enter the details given below:
- Click + Add New Account button to connect your Contentstack account as shown in the Connect your Contentstack Account to Automate step.
- Select a Stack, Content Type, Entry, Variant Group, and Variant from the Lookup list.

- Enter the Entry Data to update the variant in JSON format.

Sample JSON:
{
  "entry": {
    "title": "Sample Title Updated",
    "name": "Jane Doe",
    "group": {
      "multi_line": "This is the updated multi-line field content."
    },
    "global_field": {
      "single_line": "This is the updated single-line field content."
    }
  }
}
- Once done, click Proceed.
- Click Test Action to test the configured action.

- The output will be shown as follows. Click the Save and Exit button.


.svg?format=pjpg&auto=webp)


.svg?format=pjpg&auto=webp)
.svg?format=pjpg&auto=webp)
.svg?format=pjpg&auto=webp)
.svg?format=pjpg&auto=webp)


